Every month I include a part of my “how to get good at endo” series.
It’s a 12-part series, and these tips are exclusive to the Insider’s Group. This is NOT shared on facebook, so I appreciate you being an Insider.
So endo is tough. MB2, MB3. They exist, and they do need to be instrumented.
Before I start, to address the MB2 naysayers, I’ll show you a few cases I’ve completed over the years.
5 canal c-shaped lower 2nd molar

5 canals in a lower 1st molar
Mb2 in a upper 2nd molar through a crown

MB2 on an upper first molar
So my point is, extra canals do exist and they are out there.
The easiest way to find extra canals
There is no substitute for magnification and imaging. So the ideal setup would be a microscope and a CBCT.
Now I understand that not everyone has access to that. I completely get it. I receive a lot of emails from solo practitioners in more rural areas, or those in health clinics where the patients have zero appreciation for seeing a specialist.
So ideally, get yourself a microscope and CBCT.
If you would like to refer to the CBCT reference thread linked below, there is a great resource here. Look through the comments. The members posted real images (not stock images) and discuss the various CBCTs and if they’re happy with them:
CBCT reference thread: https://helpfuldent.ist/2NE4NV
For the rest of us, I will share with you some techniques on how to find MB2 without a microscope.
Get a light and magnification
If you do not have a scope and CBCT, I recommend a very bright LED light and loupes. At least 3.3 magnification (most of these cases were done at 3.3x) but I recently switched to 4x with a very powerful light. I’m considering switching to 5x or 6x for my endo.
Takes some time to get used to, but the visibility is much better. Remember, the higher the magnification, the more powerful light you need.
Exploring with the explorer?
I personally am not a big fan of the endo explorer. I find them too big for small canals. That’s me, personally.
I use my endo explorer to pick out pulp stones
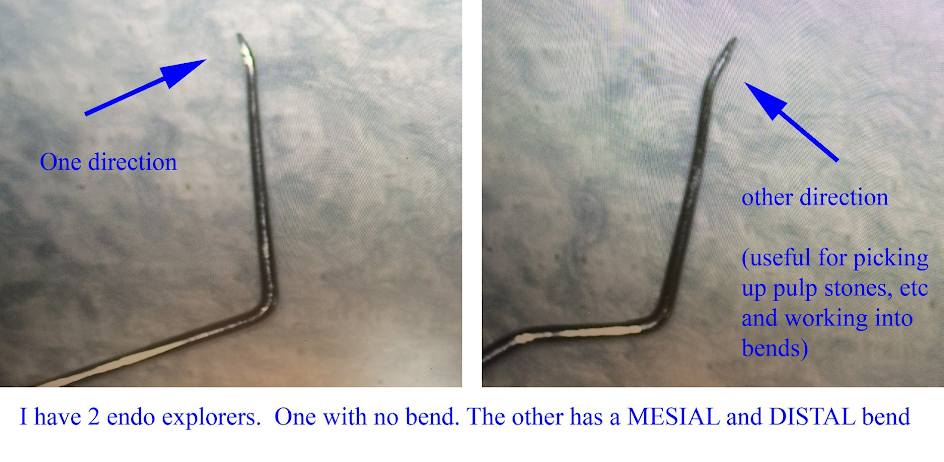
If you’re interested, here is a tip I wrote on how to modify your endo explorers: https://www.facebook.com/group
So instead of using my endo explorer, I prefer to use files. Usually 8 c-files, sometimes 10 c-files, and for the “bonus canals” it’s often a 6 c-file.
How I find MB2
A lot of it is how I hold my hand files.
The first thing to know is, I rarely hold endo hand files with my hands!
I’m not joking.
I rarely hold the hand files in my fingers.
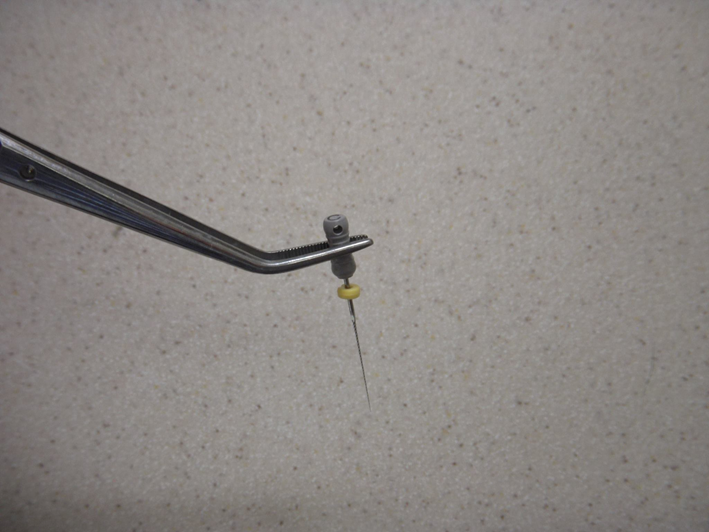
Instead I use locking pickups to hold the hand files.
Why locking?
Well it’s one less thing to think about.
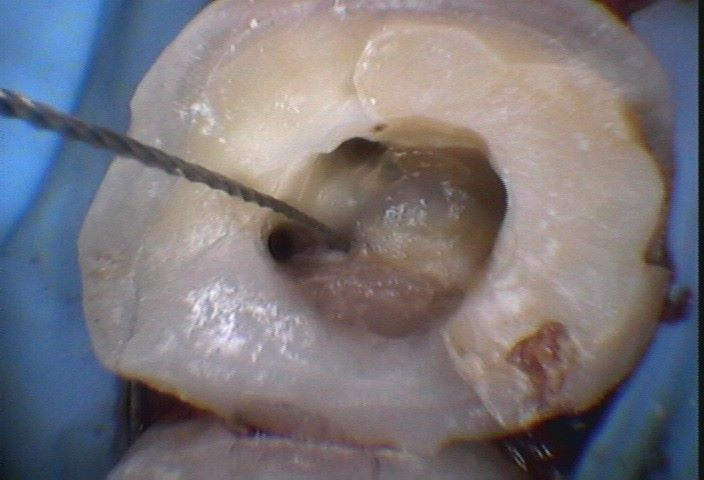
Here is an example of how I use endo hand files to be my “explorer”.
Locating the DB

MB located
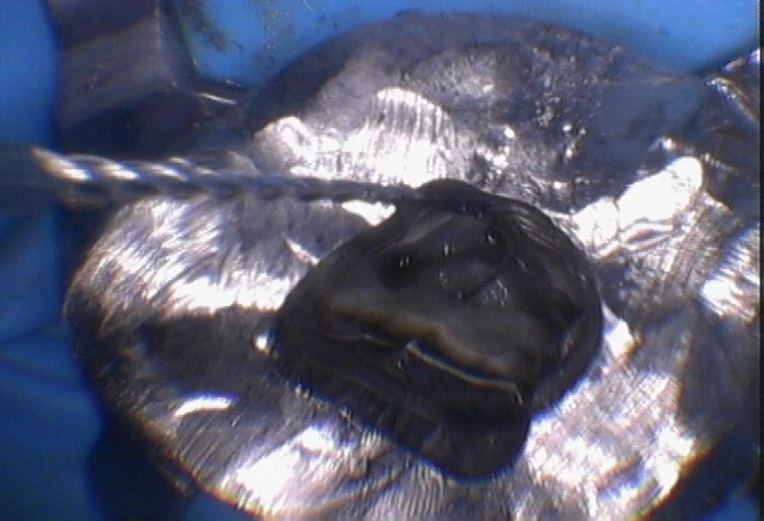
MB2 located

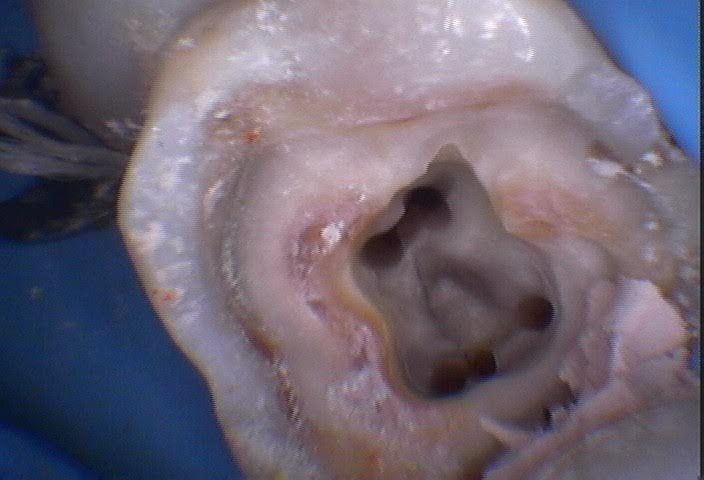
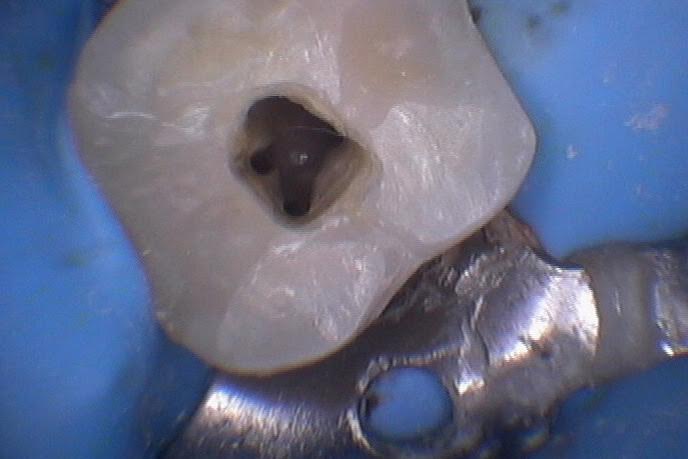
Here is the MB, MB2, and DB visible, palatal is off to the side from this angle.
So this is how I hold my hand files. It’s awesome. Give it a go sometime.
I rarely recommend brands, as often many brands of an instrument or material do the job. I only recommend specific products or brands when it is a game changer, but I will say this.
Avoid the really cheap locking pickups. I found they wear out too quickly. I went with a brand-name locking pickup and they have held up, as well as have an excellent exchange policy.
Shorter files
I also find using 21mm files on posterior teeth helps me a lot.
If you’re an associate, and your boss won’t buy you a full set of 21mm files, get the 6, 8, 10, and 15 HF’s in 21mm. Once you get past a 15mm hand file, at 21mm, you can switch to a 25mm and be fine with larger canals.
Not all cases can use 21mm files, but most do, and this leads me to my next point.
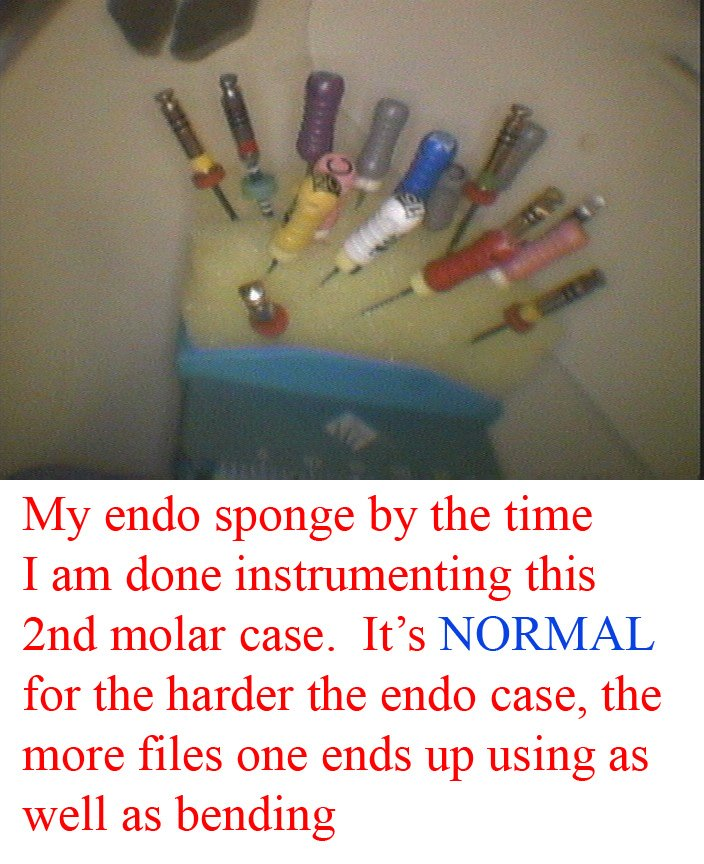
It’s normal to bend files
I did a post on this there, which you can read, but know that it’s normal to bend HFs while looking for additional canals. Nobody is immune to this. It happens
Here is a post where you can read more on finding calcified canals here: https://www.facebook.co
Flatten the cusps
This is a BIG tip. Really helps me a lot.
By flattening the cusps on posterior teeth, I get more accurate file measurements, as well as protect the tooth before the patient can receive a crown.
Flattening the cusps typically brings you into the 21mm or under range too, meaning you can use shorter files that are easier to manage.
Another benefit is, with the cusps gone, there is less difficulty placing hand files in canals, and I can see better.
So by flattening the cusps you have improved visibility, more accurate file measurements, more protection for the tooth and all you did is start the next step of a procedure the patient should receive anyway (crown prep). It makes sense to me.
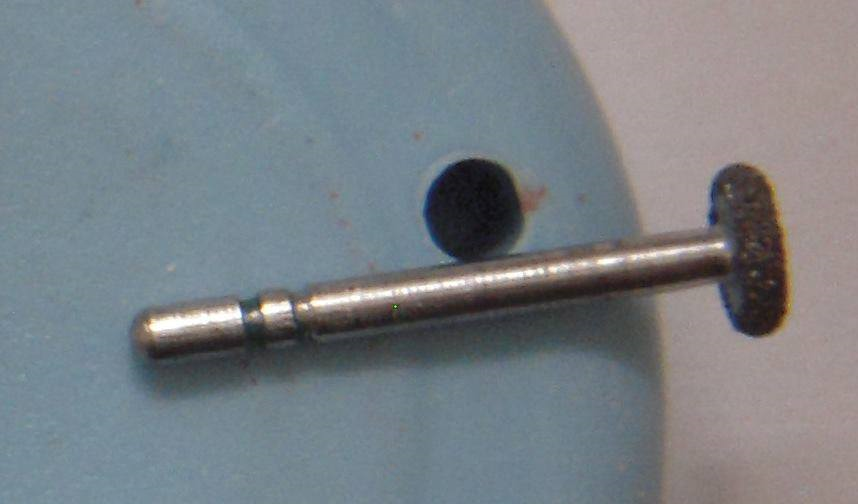
I use the diamond wheel to flatten the cusps, and then typically an egg diamond (football) to round the edges a little.
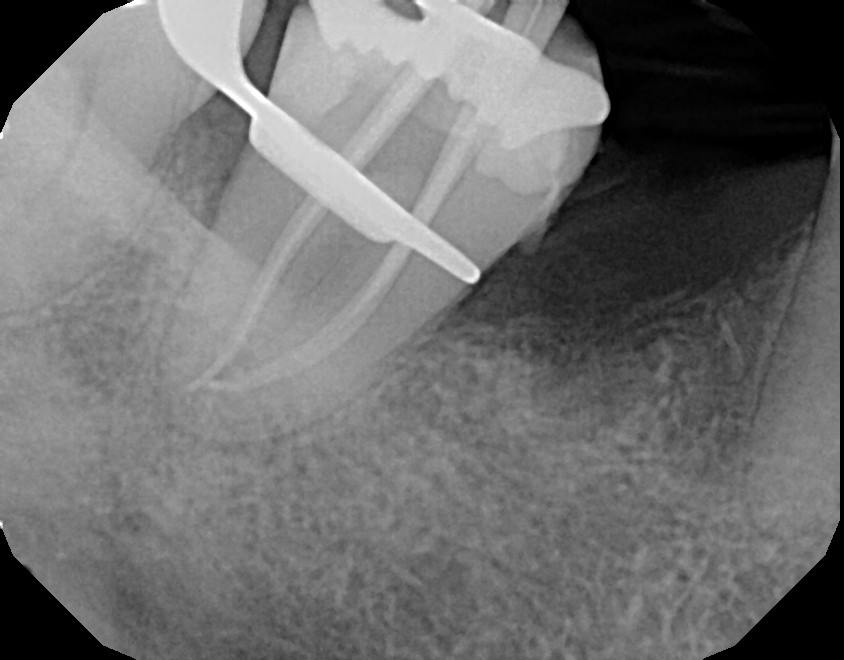
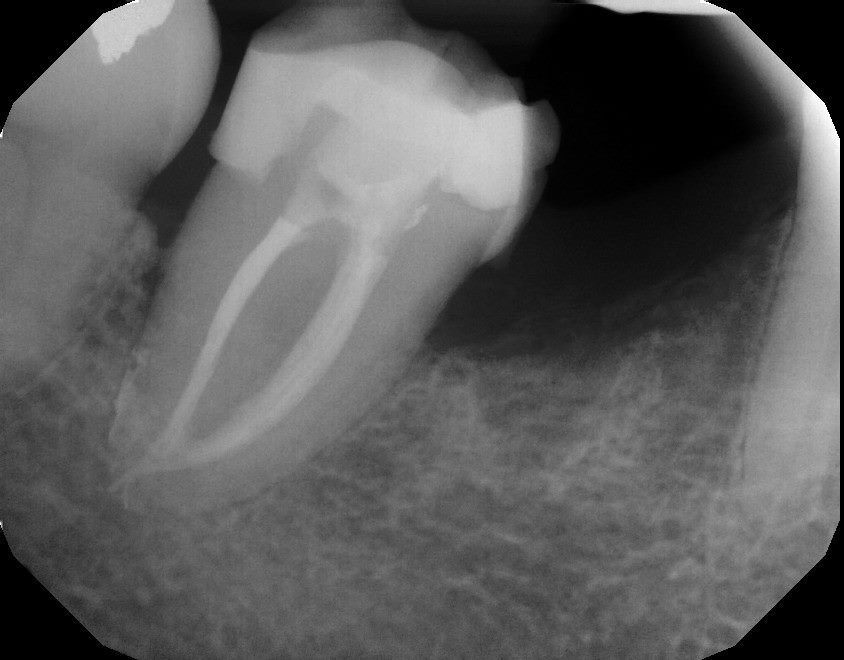
Here is a clinical example and radiographic example of the type of reduction I’ll do.
This lower 1st molar had 5 canals. Here is the final obturation.
Instrumented 4 canals and then troughed in mid-mesial because the area looked suspicious
I like c-files
I’m a big fan of c-files. It’s personal preference. I find k-files too bendy and C+ files are too stiff.
ANY brand of c-files is great. I’ve tried a number of different c-files. I suggest using the most cost-effective / biggest promotion of a c-file and buying them in bulk.
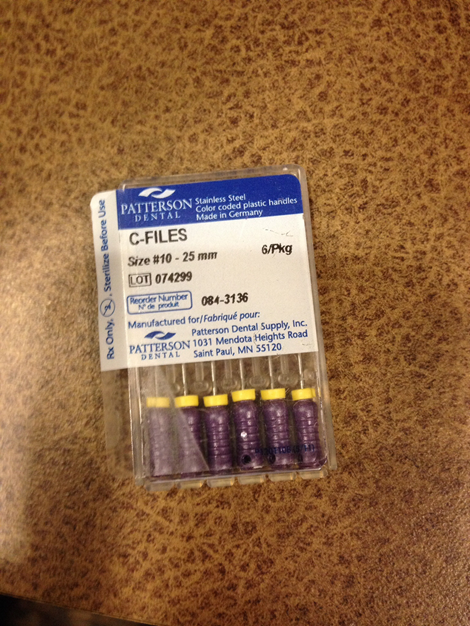
That’s my personal opinion, but I find c-files are easier to use in my hands than k-files. Especially on tight canals like MB2s.
Bleach and ETDA
I like to flood the chamber with bleach or EDTA.
I use a lot of bleach.

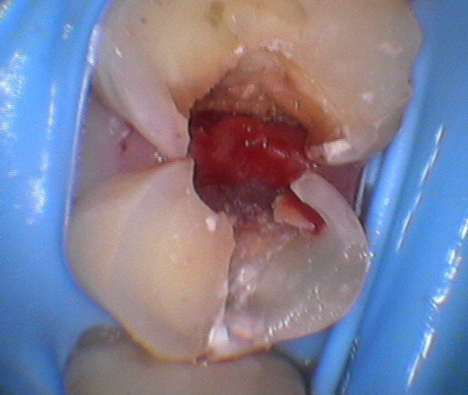
If the decay is a class II, I will build up the proximal box in composite, so I can flood the bleach in the chamber and get additional contact time or disinfection time.
It’s empiric, and purely something I noticed, but I seem to find the MB2s a lot easier after the chamber has been sitting in bleach and EDTA for 20-30 minutes.
Sometimes I get lucky and find the MB2 right away
But what I usually do is I locate my main canals (say MB, DB, P), and instrument them while the chamber is flooded in bleach. Then once I’ve got those canals finished, I continue to look for MB2. Often the bleach and EDTA time helps uncover the extra canals.
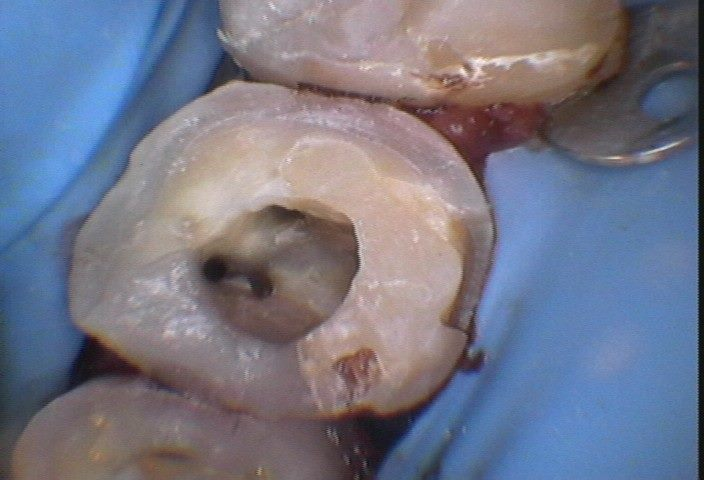
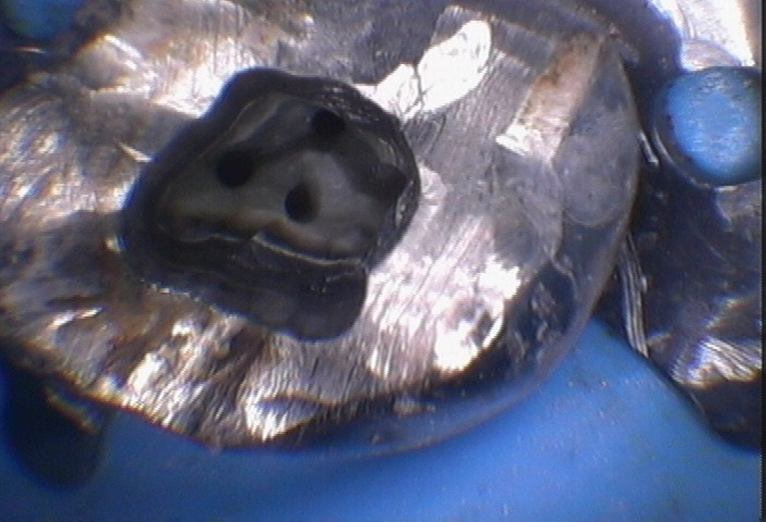
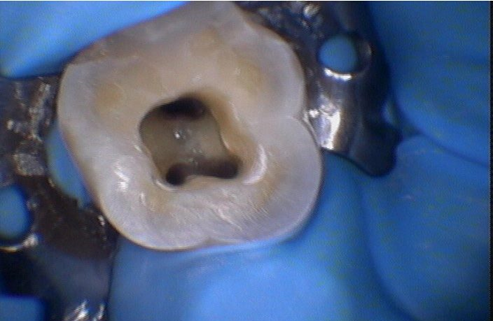
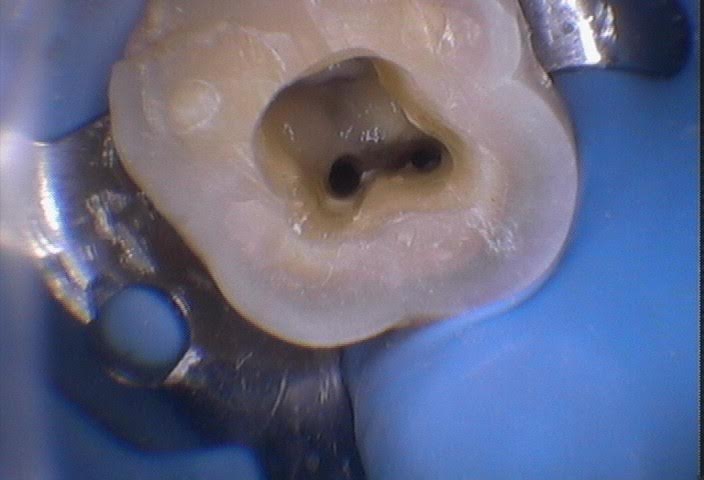
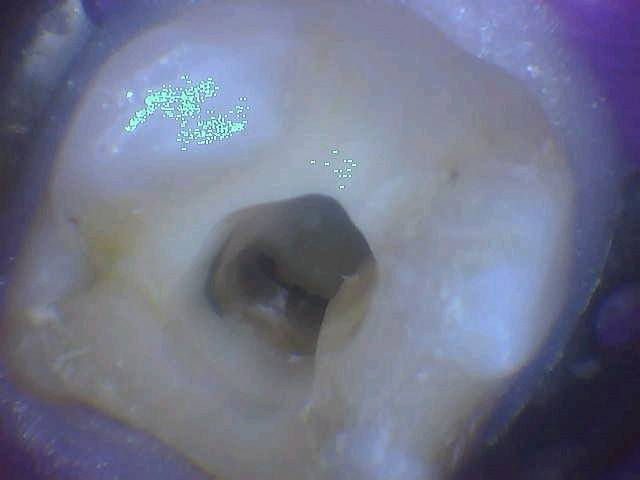
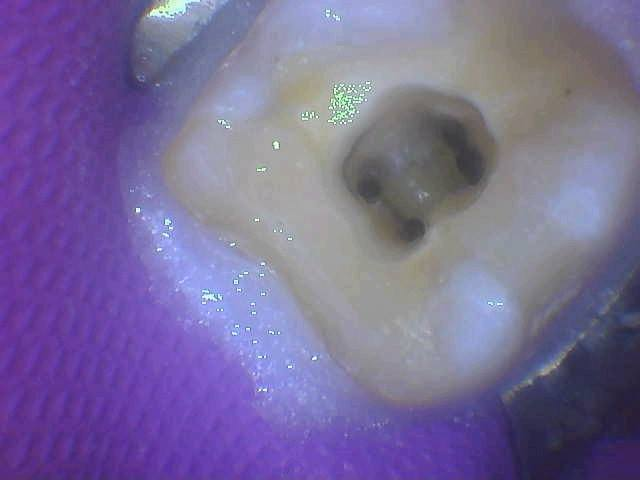
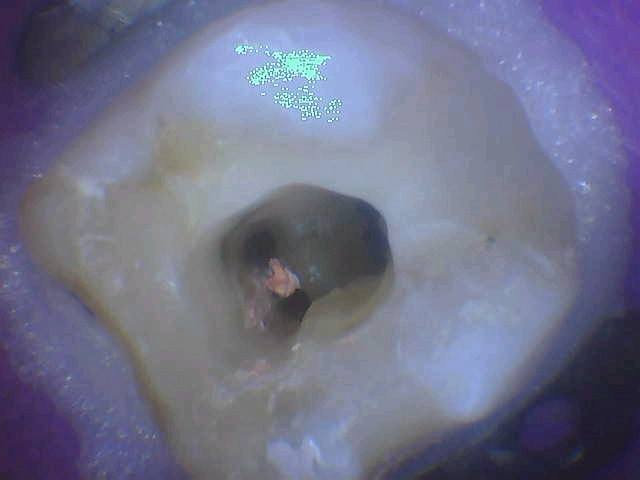
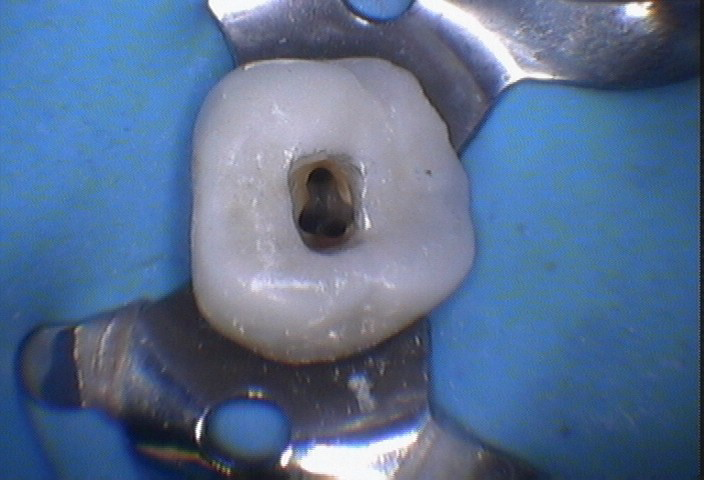
Here is a case where I located the MB, DB, and P, and then went searching for the MB2
So pictured at this point is MB, DB and P that has instrumentation complete before I even start to look for MB2.

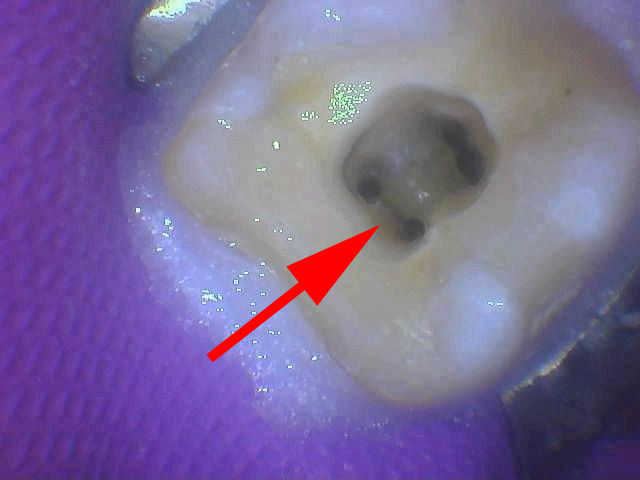
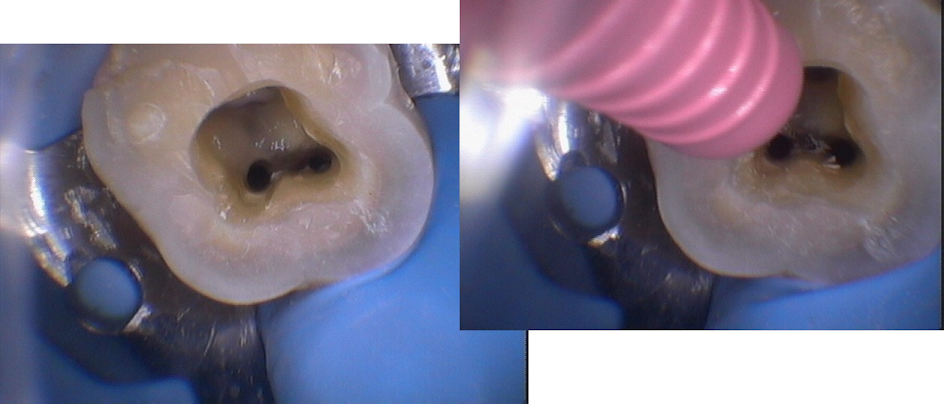
Found the MB2 with a 6 HF. Pictured here is after I instrumented the area to an 8 and placed a 10 c-file in there.
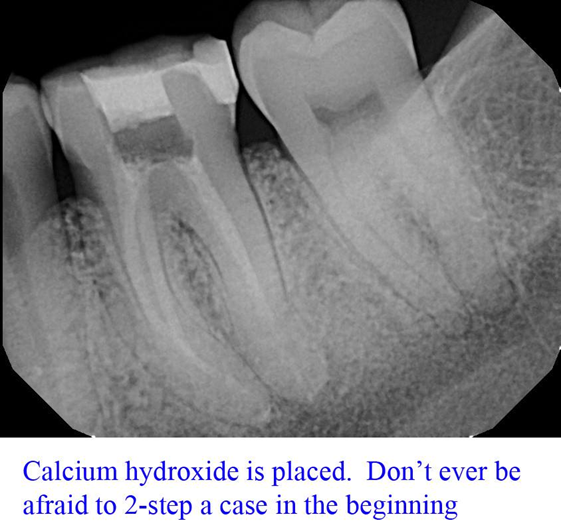
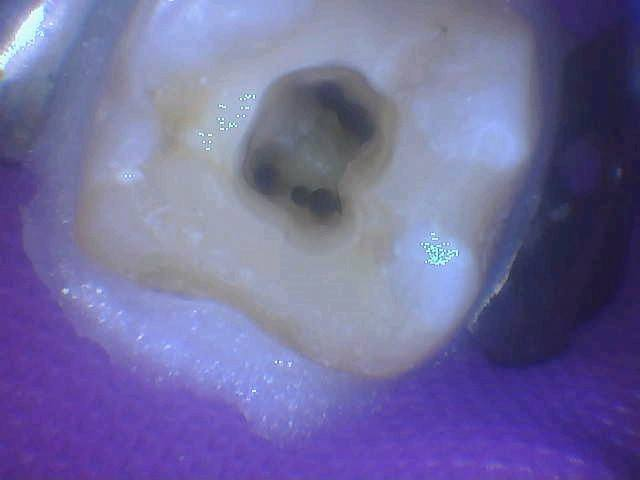
After instrumenting the MB2 as well and ready to take the calcium hydroxide (I was two-stepping this case)

Take your time, especially at the start
Why not book your endos in two 90 minute appointments. Offer to the patient to send to end, let them know you’ll be longer, and do your cases in calcium. I’m a simple GP and I still do a number of my cases in 2-steps for endo on molars. Nothing wrong with that.
While patients appreciate efficiency, dentistry is not a race.
Giving yourself more time lets you get the hang of locating MB2 and where to look.
You can always offer to do the crown prep the day of obturation. Patients love that convenience.
Trough suspicious areas selectively
You cannot be afraid to look. Use caution and good radiographic analysis and pay attention to furcations.
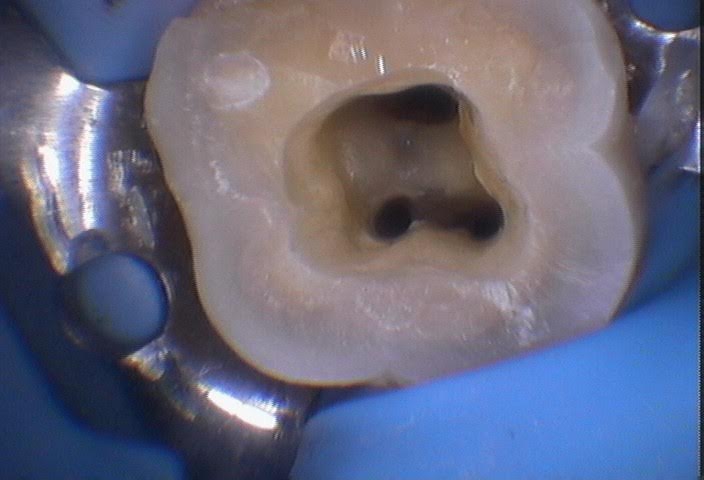
Find a full-unroof of an area is important to do. I will give you an example
Accessed this tooth. Here is the initial access
I instrumented the MB, ML, DB and DL canals.
But I don’t like the line between the MB ad ML region.
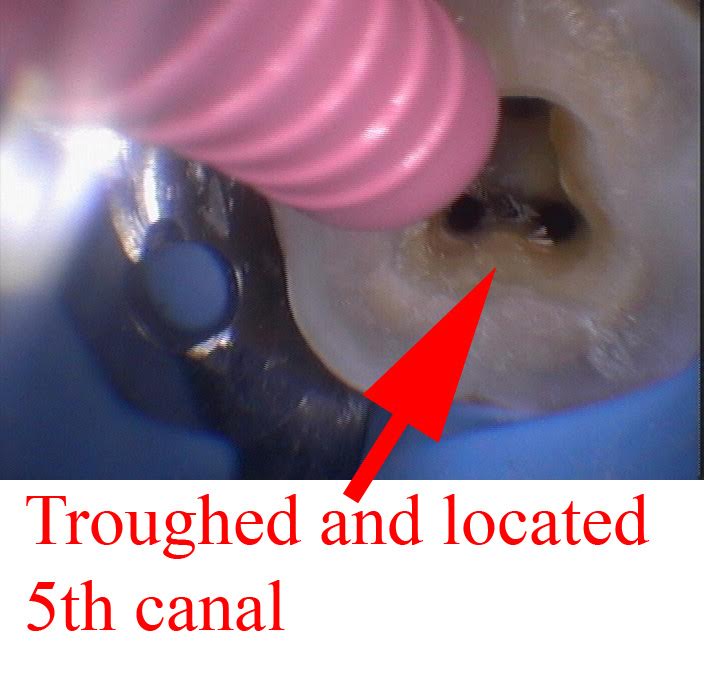
So I trough there with my ultrasonic. I used to use the diamond that looks like a crown prep diamond, but these days I would use the small ball to gently look.
Then I start to search with my locking pickups and a 6 or an 8 c-file
Boom. Success! This photo is after instrumenting the 5th canal.
A lot of time these extra canals join, but in this case the mid-mesial canal did not join, so I obturated it first to to make obturation in the ML and MB first.
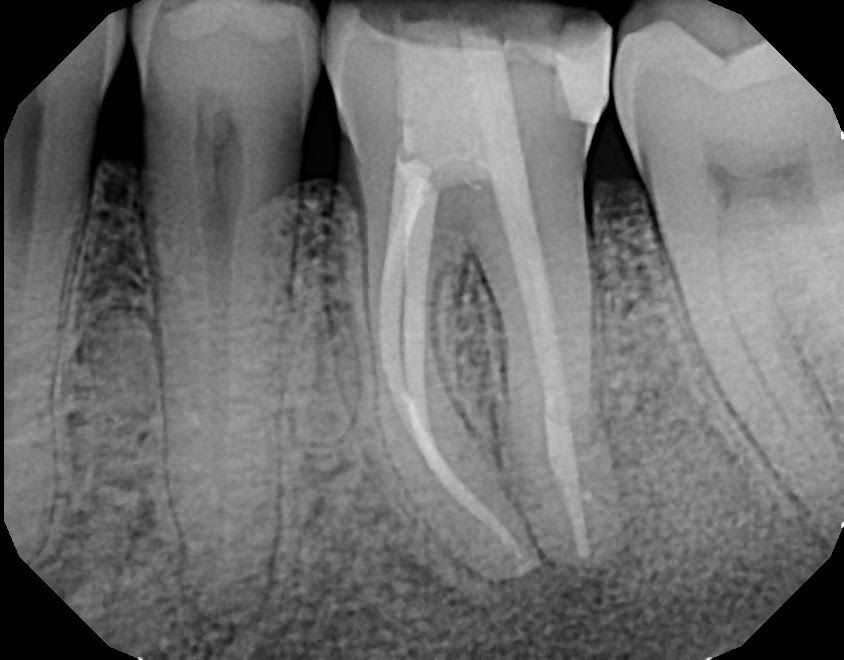
Here is the master-cone shot.
Final obturation:
Close or far
Know that the extra canals can be very close together or very far.
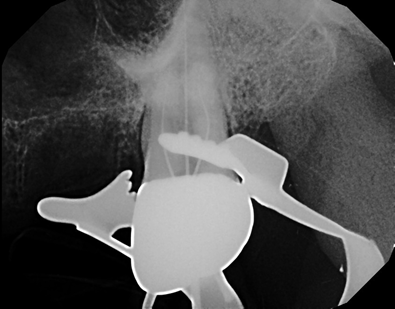
Here is an example of the canals being further apart.
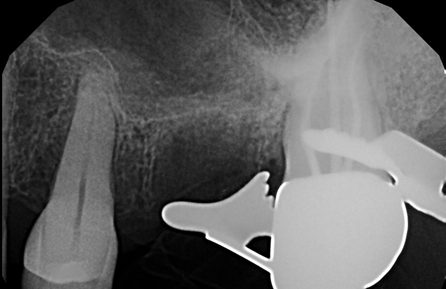
Here is a different case where canals are much closer together. Of course, it’s through a crown on this one. The weird canals are always when doing it through a 2nd molar crown.
So what I’m saying is this:
In dental school they taught me a certain distance from the MB is where to find the MB2.
Yes, technically the research shows a higher prevalence of MB2 in a particular location, but you have to prepare yourself to look everywhere.
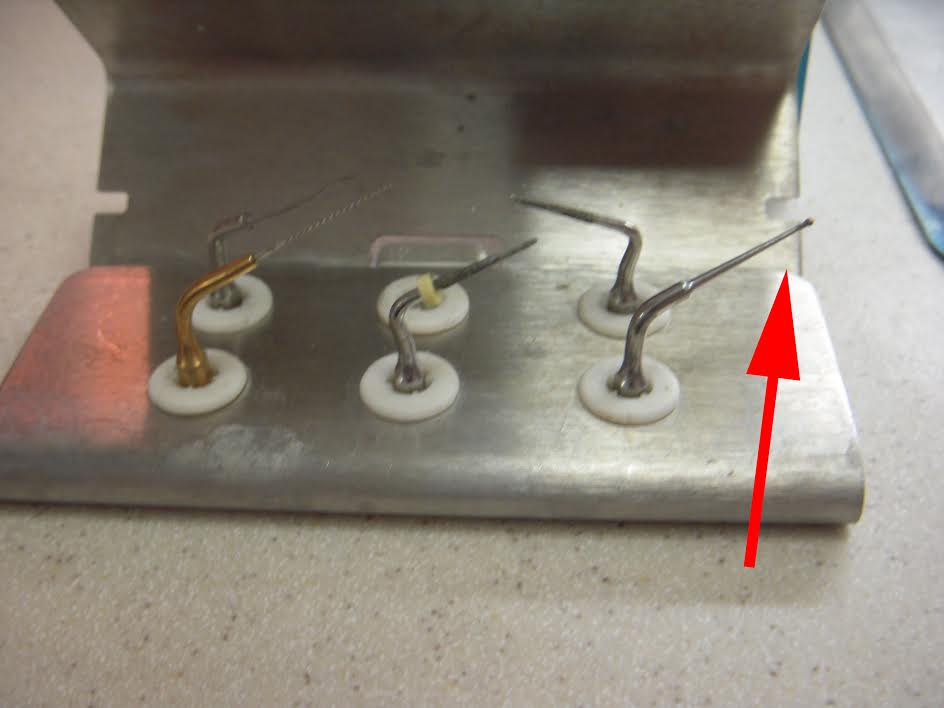
Ultrasonic or small bur
Getting an ultrasonic helped me a lot.
If you do not have an ultrasonic, consider getting a #1/2 round or #1 on a surgical length slowspeed, and you can selectively trough.
The surgical length, purely because it’s a longer shank, and you can see more around it.
Personally I don’t know how I did endo without an ultrasonic.
I am not saying that the slow speed bur is the same as the ultrasonic.
I find the ultrasonic works better in my hands, but a slowspeed bur can be used to trough.
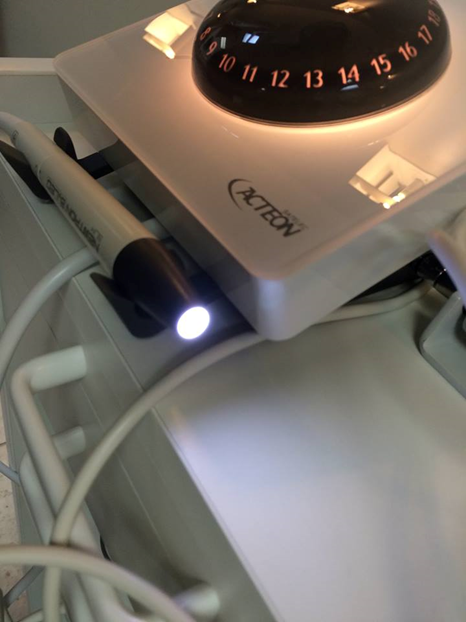
I have a Newtron P5, but there are a LOT of great models out on the market.
I am not recommending Acteon’s model, but I recommend you get an ultrasonic.
If you end up getting the Newtron do not bother paying extra for the LED. I did, but it was a waste of money. Doesn’t improve any viability.
The most important thing in finding MB2
The biggest thing of all is to go looking.
If you see a fin, if you see something suspicious, try to guide a hand file file down there.
Place the file in the canal and unlock the pickups.
I’ll give you some examples
Here is an MB2

Here is a MB, ML and a mid-mesial
You gotta start putting 6 and 8 files down these areas and exploring for them. You’ll feel yourself get sucked in, and then watch wind down.
I hope that these tips are helping.
To your success,
Dr. Greg (aka “The Helpful Dentist”)